Fly fly fly de butterfly
Hello there!
Today I would like to share to you a simple way on how to do a paper quilled butterfly.
This is my first tutorial post and I am not sure if how you will find it. Anyway the procedures are so simple and very quick.
You may discover your own way of doing it but this one works for me.
For questions, you may send it through email found on my contact.
Have a great time everyone!
HAPPY QUILLING!
|
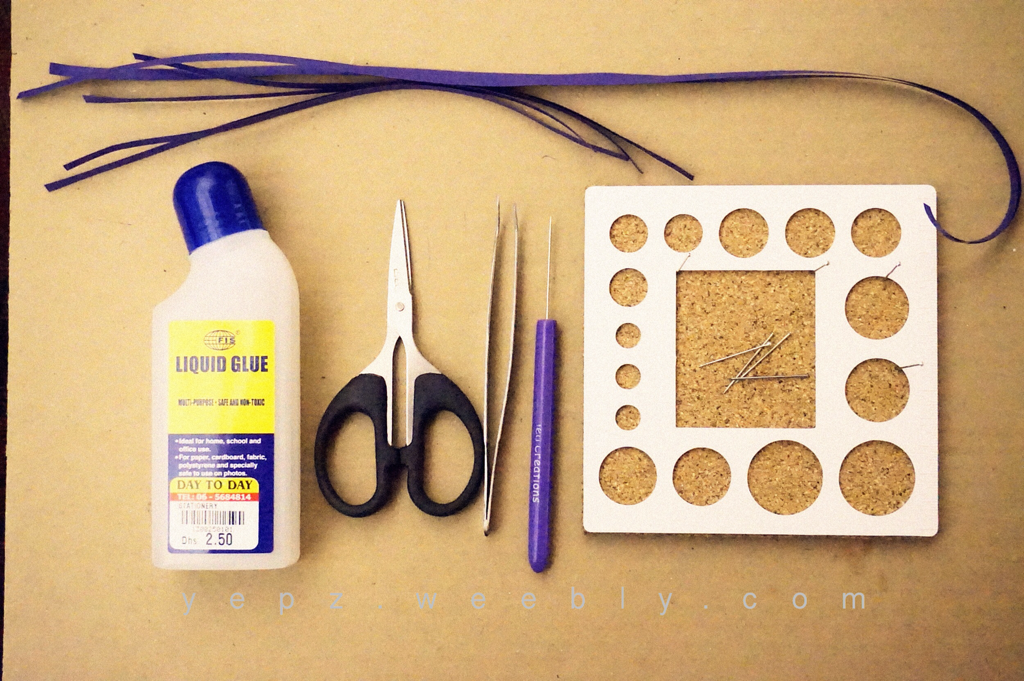
Essentials:
1. PAPER STRIPS 5mm(2 strips 17.5 in long, 2 strips 8 3/4 in , 1 strip 4 inch) 2. Glue 3. Scissors 4. Tweezers 5. Quilling needle 6. Quilling Board 7. Pins |

STEPS:
Wings
A. Using a slotted tool make a roll of your longest paper up to the end of the strip.Make sure not to make it tight.
B. Make an offset circle, loosen your rolled paper and place in the quilling board. I used the 1 inch diameter circle as my guide. Apply glue at the end of your strip then pin to secure it. Get another pin, position it on the center of your circle then move it towards the side where you have your first pin. Apply glue in between of the rolls and pin it.
Wait for a minute or two to dry the glue.
C. While waiting for the 1st circle to dry, make another wing with your strips. For a smaller wings,follow step B only that your circle now is a bit smaller. I used 2cm diameter circle as my guide.
D. When your circles are dry remove it carefully from the board and press a little on the portion where your rolls gather.
E. This will make you a teardrop like offset scroll. Do it on your 4 circles.
ANTENNA
F. With your shortest strip left. Fold it in a half. Using your slotted tool make a roll(this one is tight) of the first half towards the outside direction. And so with the other half. Make sure the rolls are not too big nor too small for your butterfly.
And finally assemble all the wings and the antenna that of a butterfly and glue them together.
Thank you!
27/05/15
